
Complete Feature Tour
Writefully So is organized around the way a novel grows: start a project, collect the story, draft chapters, understand the cast and world, revise the manuscript, and keep the finished work portable.
This page is the map. Each section links to a focused how-to when you are ready to go deeper.
1. Start a Project
Section titled “1. Start a Project”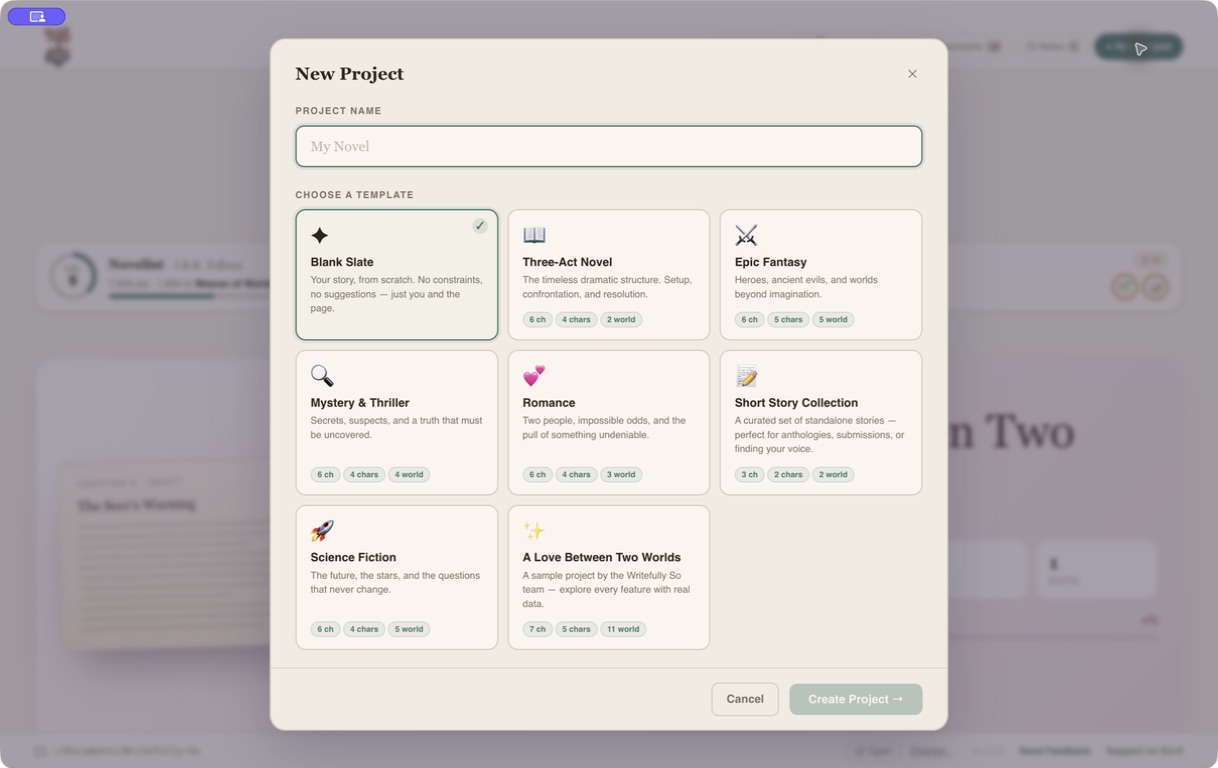
Click New Project in the library and choose:
- Blank Slate for an empty project
- A genre template for starter chapters, characters, and world entries
- A Love Between Two Worlds to explore a complete sample without using your own manuscript
Templates are starting points, not permanent modes. Everything they create can be renamed, moved, edited, or removed.
Continue with Your First Project.
2. Use the Binder and Project Overview
Section titled “2. Use the Binder and Project Overview”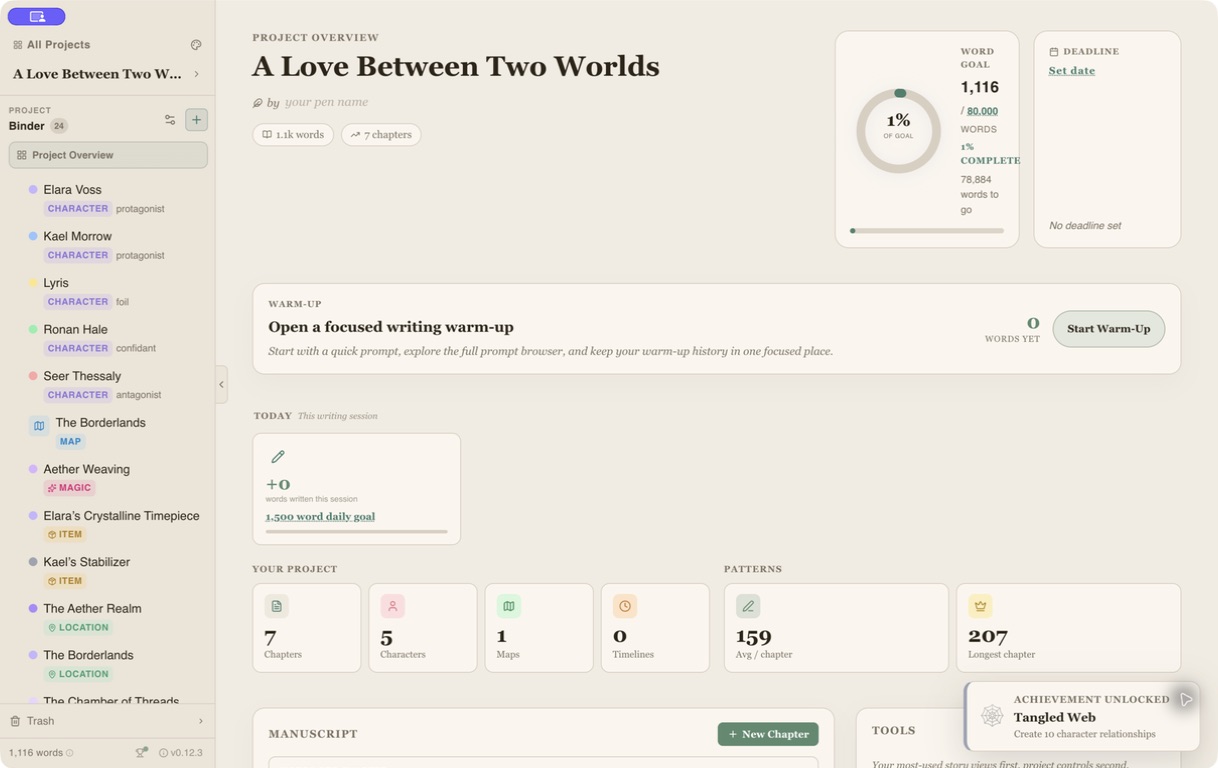
The binder keeps chapters, folders, characters, maps, timelines, and codex entries in one tree. Drag items to reorder them or drop them into folders. Compact controls beside Binder switch to automatic content categories or sort the current view in Binder order, A–Z, or Z–A without changing the manuscript’s saved order.
Right-click a chapter or an entire folder to exclude its contents from your manuscript word count while keeping the material available for notes, research, alternate scenes, or later revisions.
The Project Overview shows:
- Project and daily word goals
- Warm-ups and current-session progress
- Chapters, recent activity, cast, and world entries
- Character Web, Manuscript reader, Presence Map, Outliner, Writing History, Manuscript Health, and Knowledge Map
- Highlighted notes, page setup, export, backgrounds, and backup status
From the workspace library, switch between grid and bookshelf views. In bookshelf view, use Shelf finish to recolor the full bookcase with Honey Oak, Strawberry Milk, Lavender Dream, Sage Cottage, Starlight Blue, Ink Black, or Porcelain White. The selected finish is saved for the workspace, and the center of the crown is engraved automatically with your pen name or initials.
Your author level, achievement progress, and pinned badges live in the top header so the dashboard keeps the same layout while achievement data loads.
3. Draft and Format Chapters
Section titled “3. Draft and Format Chapters”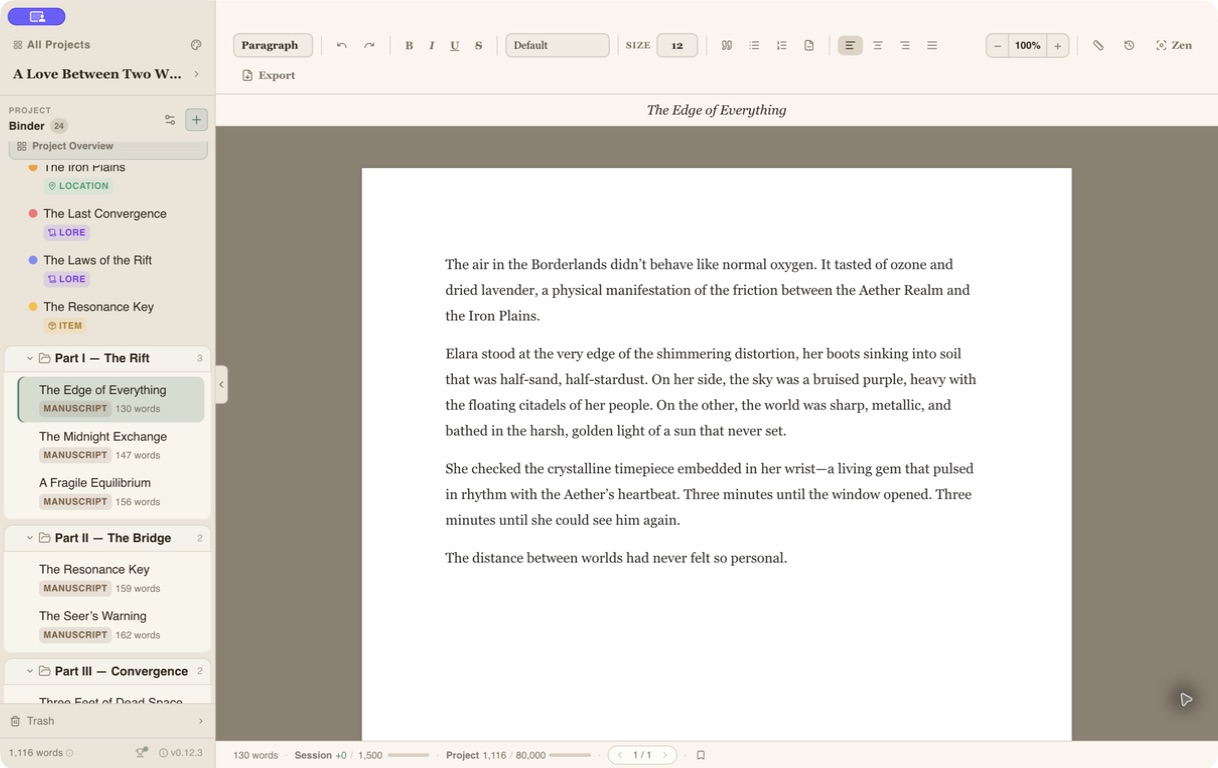
The editor supports rich text, page layout, keyboard shortcuts, comments, highlights, zoom, and live word counts. Use Zen Mode for focus or open a split pane when you need a character, world entry, or another chapter beside the draft.
Read:
4. Plan the Whole Manuscript
Section titled “4. Plan the Whole Manuscript”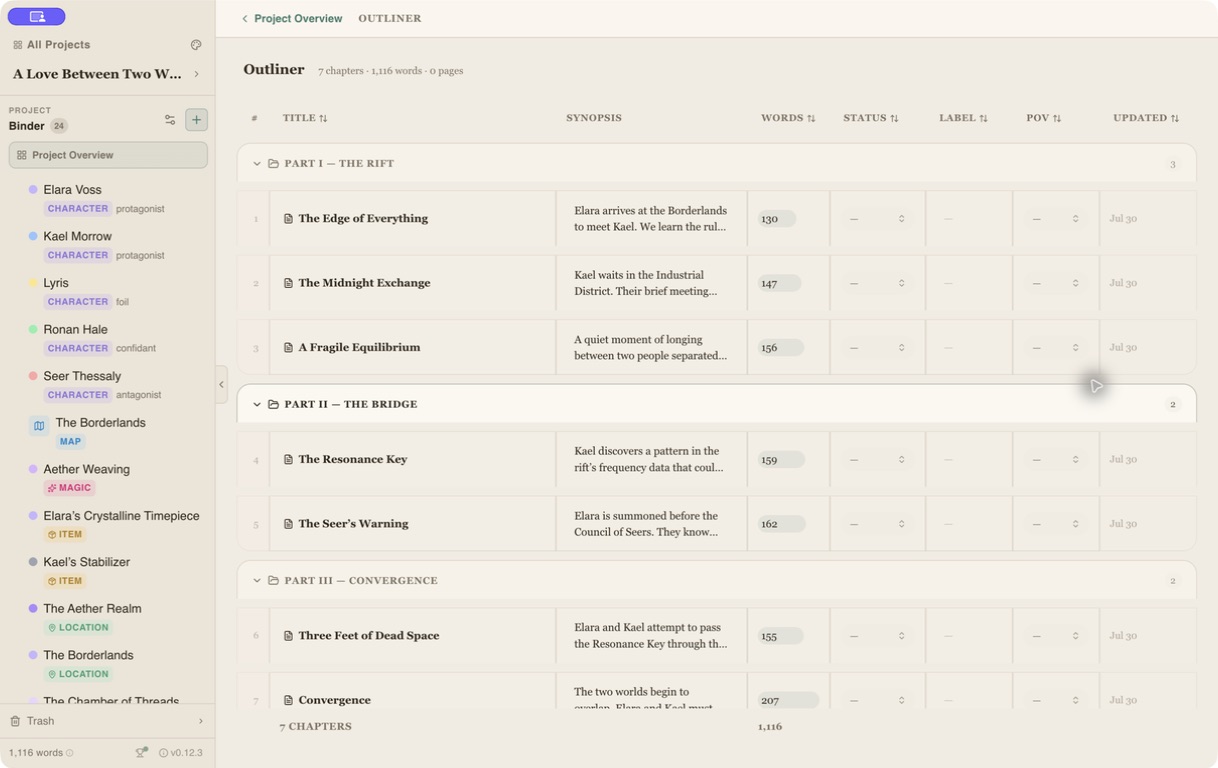
The Outliner puts every chapter in one sortable table with synopsis, word count, status, label, point of view, and last-updated date. Use it for structural passes when opening chapters one by one would hide the pattern.
You can also use the corkboard for a card-based view or the Manuscript reader for a continuous pass through the draft.
Read Outliner View and Project Overview.
5. Build Characters
Section titled “5. Build Characters”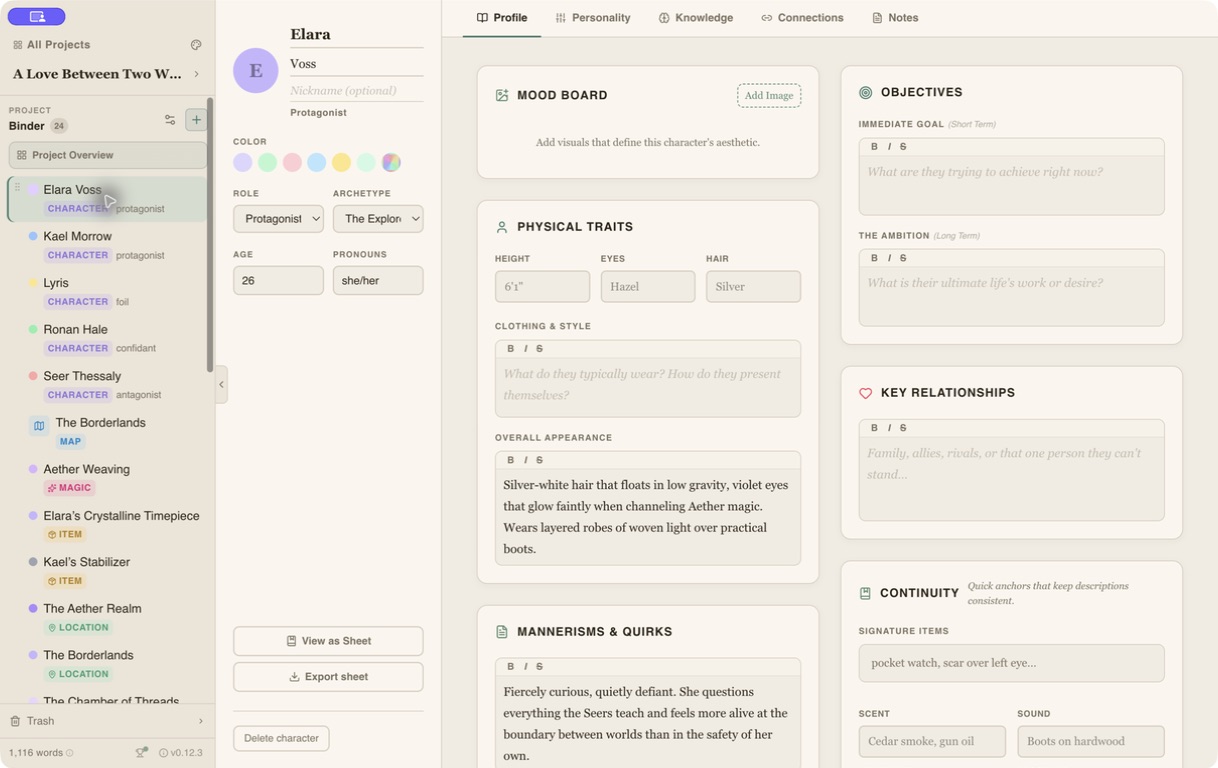
A character can include:
- Role, archetype, age, pronouns, portrait, and mood board
- Appearance and continuity anchors
- Want, need, fear, flaw, strength, backstory, and arc
- An eight-axis personality spectrum
- Moral alignment and core values
- Typed relationships, notes, and story connections
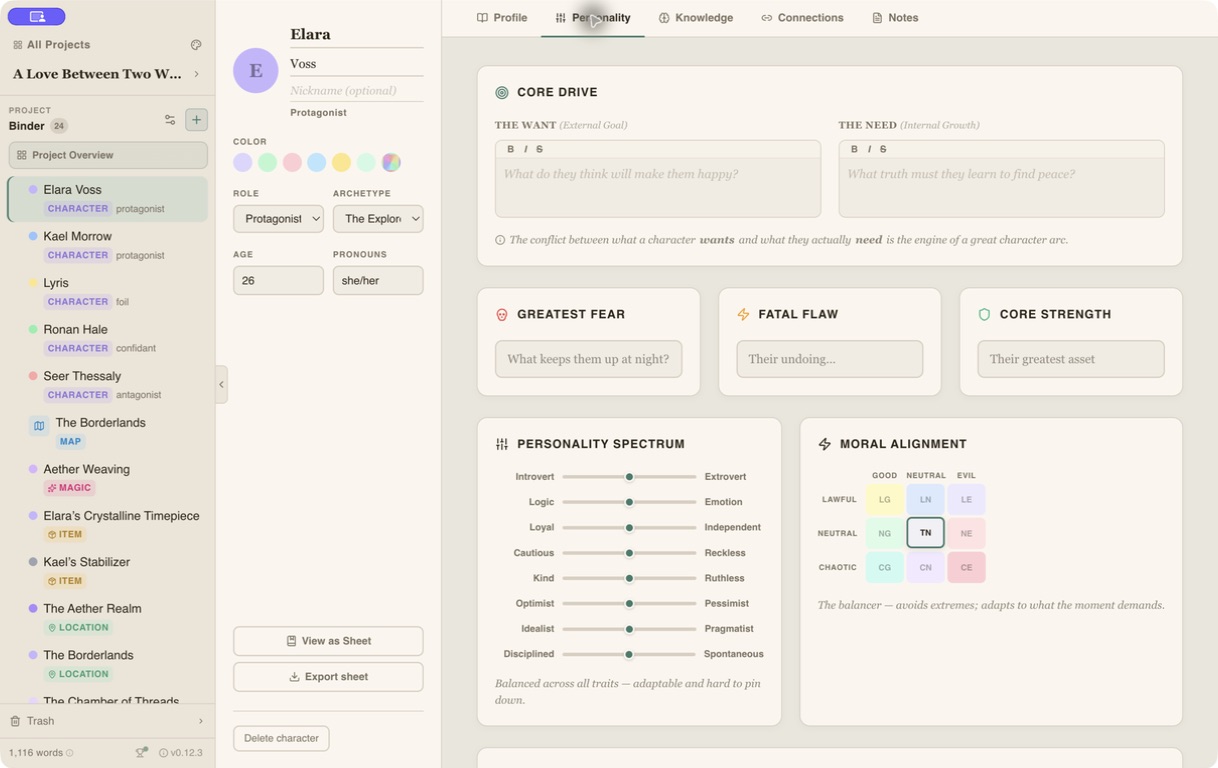
The Character Web visualizes relationships. Character Presence scans chapter text to show where each character is named. The Knowledge Map tracks what each person suspects, knows, proves, forgets, or hides as the story progresses.
Read:
6. Build the World
Section titled “6. Build the World”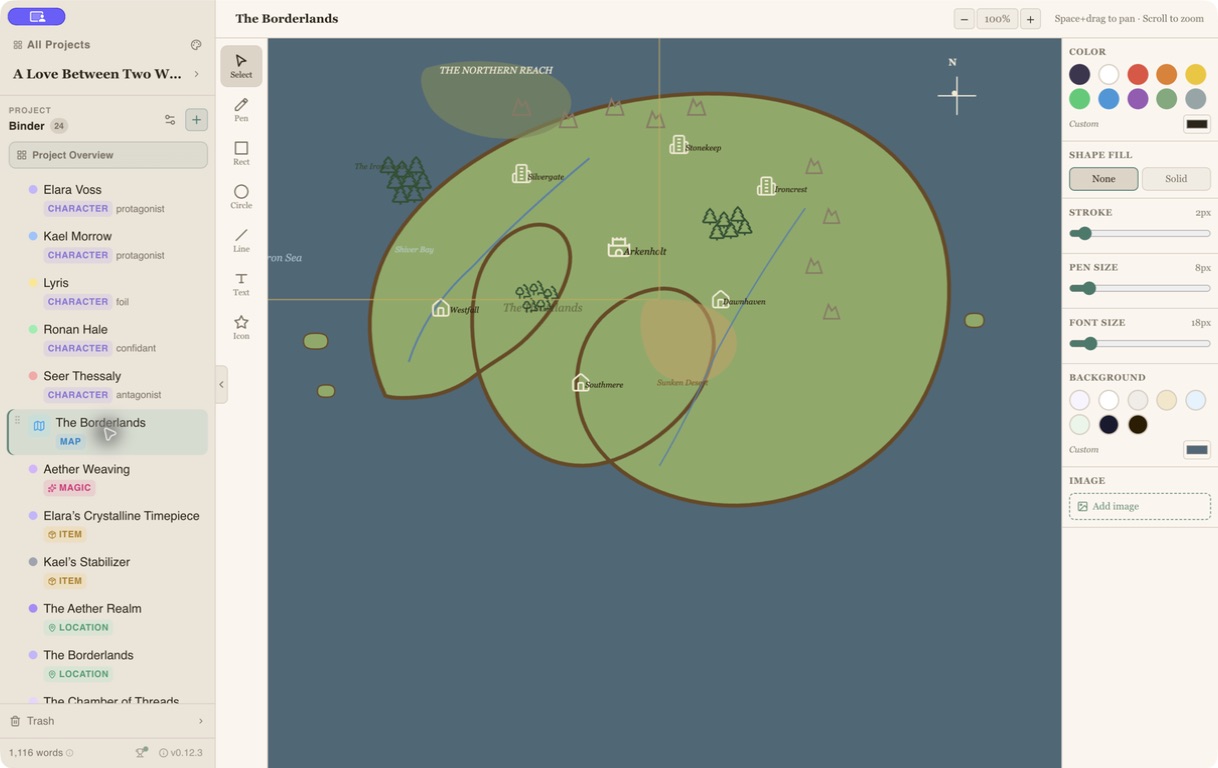
The codex provides dedicated entries for locations, lore, items, and magic systems. Each type has fields suited to that kind of world-building, plus notes and connections.
The 3D World Builder lets you expand a world one land or ocean tile at a time, sculpt and paint terrain, place mountains, castles, fortresses, villages, temples, bridges, individual people, clustered armies, labels, and story pins, and keep the view live while you edit.
Legacy 2D maps remain separate for flat maps, imported map art, drawings, labels, icons, templates, custom colors, and background images. Timelines organize plot, character, world, and turning-point events.
Read:
7. Understand and Revise
Section titled “7. Understand and Revise”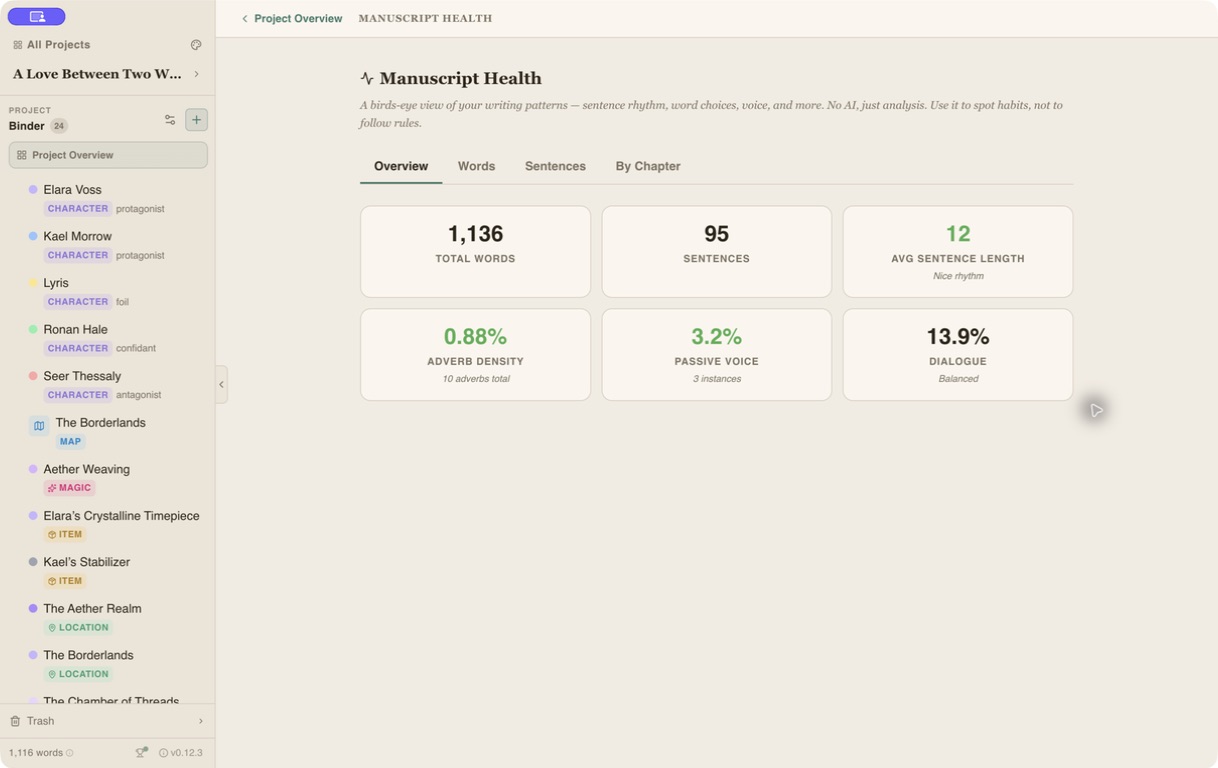
Manuscript Health analyzes writing patterns locally. It does not use AI or upload your prose. Review sentence length, adverbs, passive voice, dialogue, vocabulary, and chapter-level differences as signals—not rules.
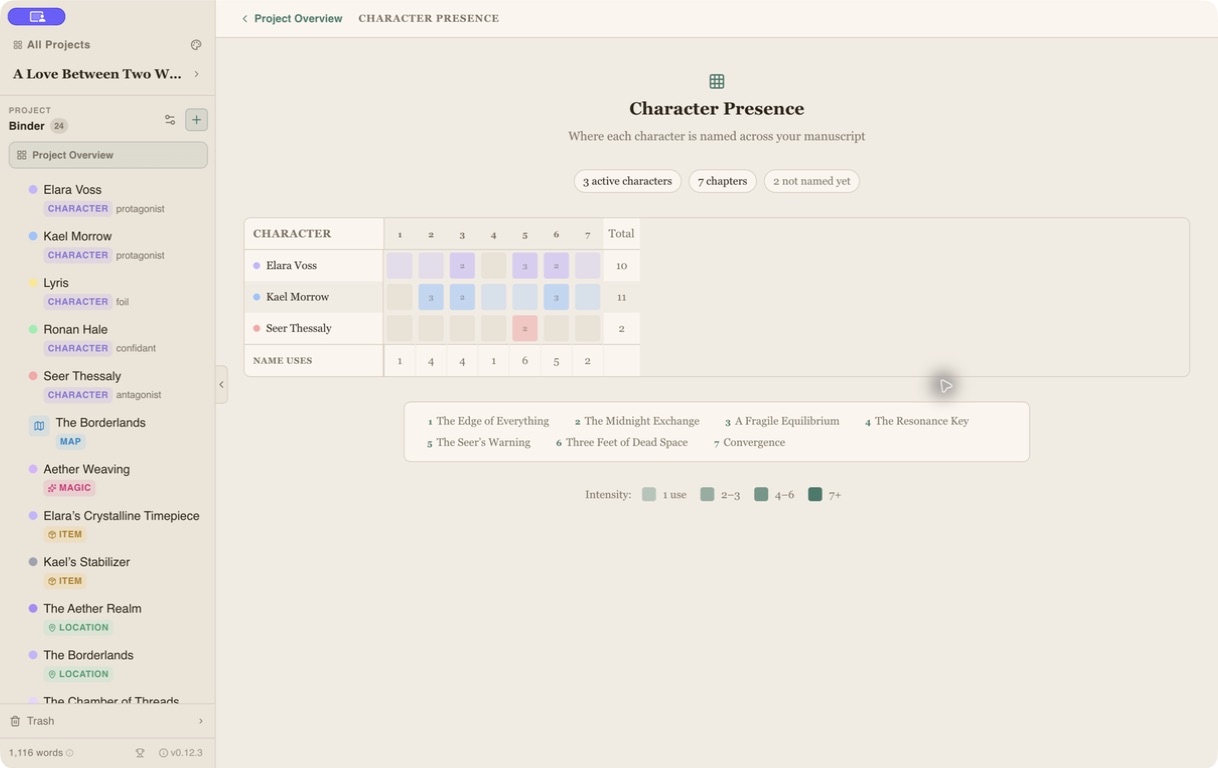
Writing History, session tracking, highlights, comments, note cards, snapshots, and the presence heatmap give you different lenses for revision.
Read Manuscript Health, Session Tracking, and Snapshots & Versions.
8. Export and Protect the Project
Section titled “8. Export and Protect the Project”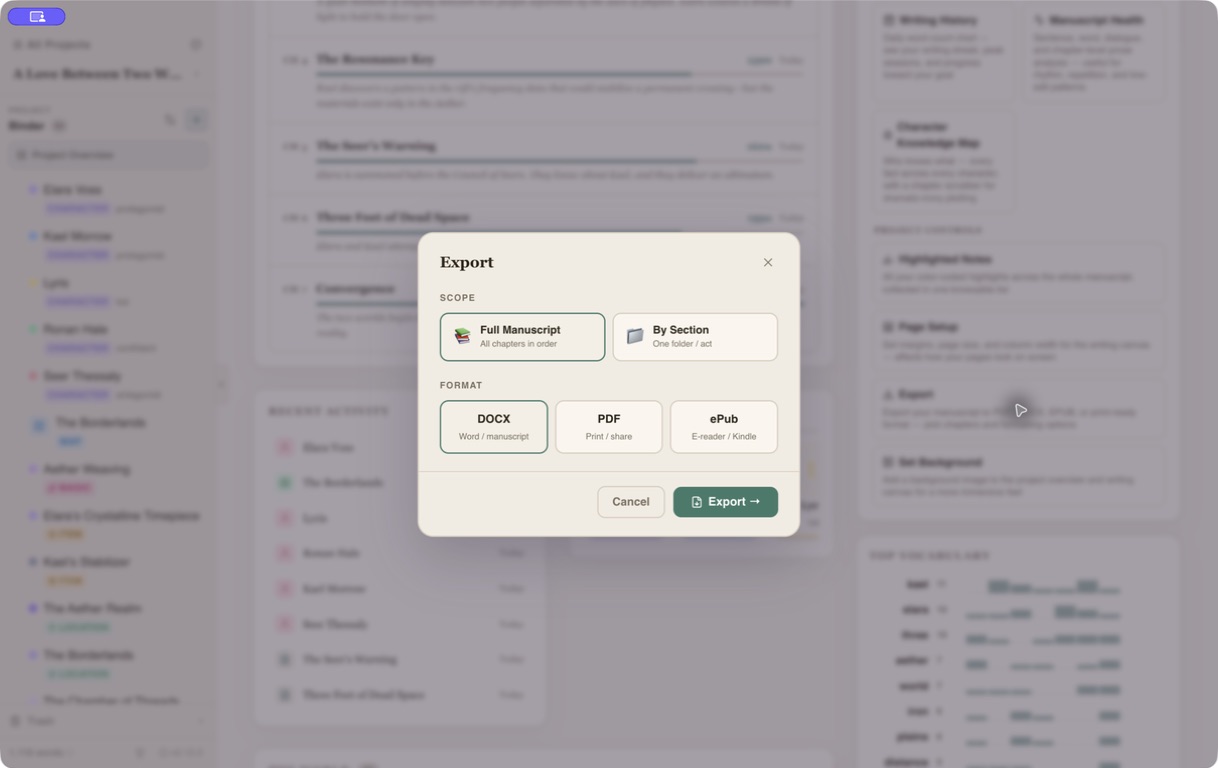
Export the full manuscript or one folder/act at a time as DOCX, PDF, or ePub. ePub exports include selectable interior styles and author metadata.
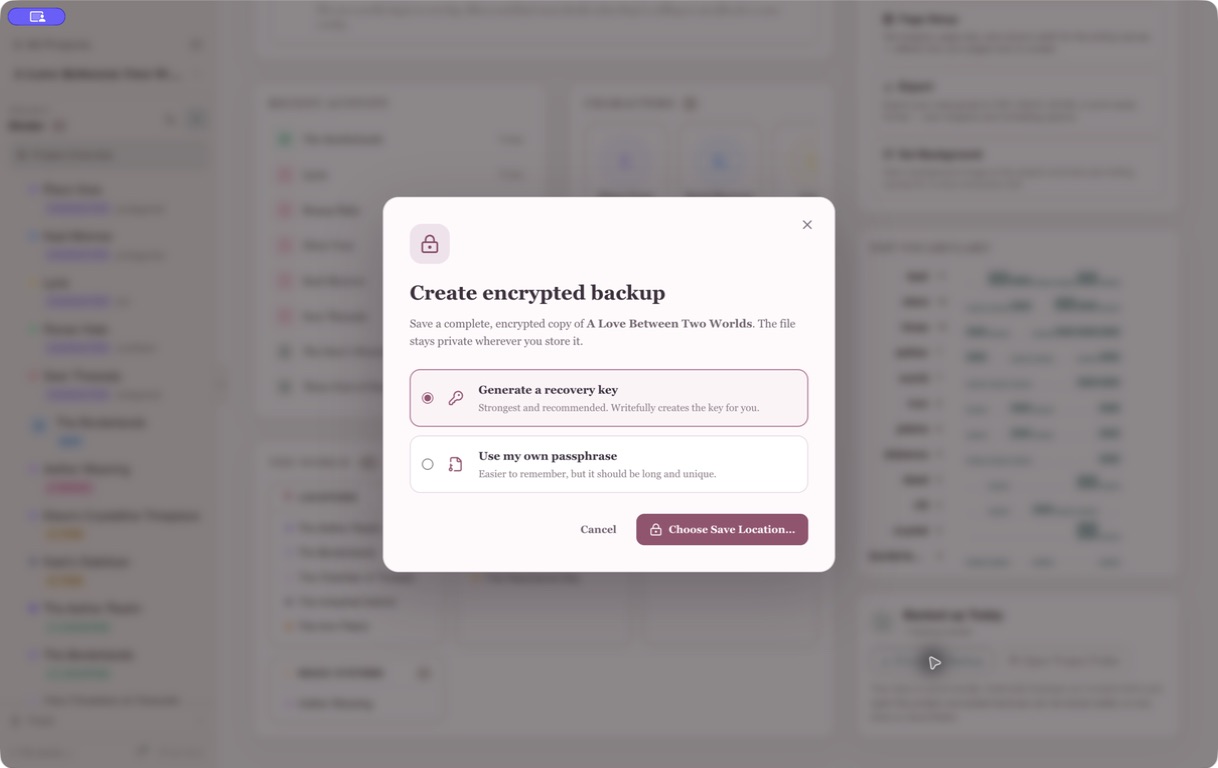
Writefully So also creates automatic local backups, can mirror every project to another folder once a day, and can create a portable encrypted .wfbackup file for off-site storage.
Read Export & Import and Backups.
9. Track Progress Without Giving Up Privacy
Section titled “9. Track Progress Without Giving Up Privacy”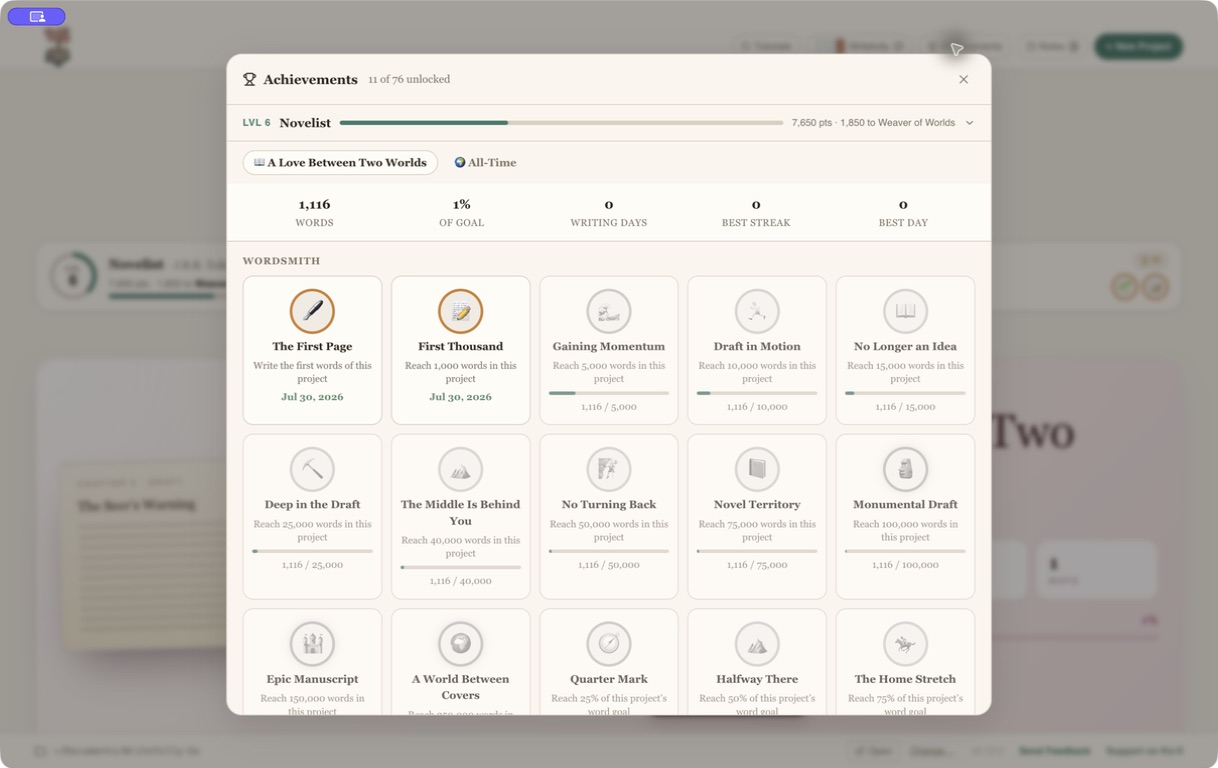
Daily goals, project goals, writing history, streaks, author levels, and project or all-time achievements make progress visible. The tracking stays on your computer with the rest of your workspace.
A Good First Route
Section titled “A Good First Route”If you want to learn by doing:
- Create A Love Between Two Worlds from the project picker.
- Open a chapter and try the editor and Zen Mode.
- Open Elara Voss and switch between Profile and Personality.
- Return to Project Overview and open Character Web, Presence Map, Outliner, and Manuscript Health.
- Open the 3D World Builder and place a few terrain tiles, landmarks, labels, and story pins.
- Open Export and Encrypted Backup, then cancel before choosing a save location.
The showcase project is designed for experimentation, so you can explore before importing or creating your real manuscript.